Adding Skybox :
Skyboxes are a wrapper around
your entire scene that display the vast beyond of your world.
Select Edit menu-> Render setting- >Skybox
material-> Select any one of the skybox available.
Main Camera :
As soon as we create a new scene in Unity there will be a default
Game Object Called Main Camera which gives us the view of the scene being
developed. As we are developing a game based on sphere in a plane, using a
camera which doesn't move and see much it would be difficult for a participant
to observe the movement. In order to Facilitate we are attaching the camera to
the Player Game object. We can attach the camera to player object as a child
object or based on player object transformation position.
Attaching a camera to player object as a child object is not advisable.
Consider the player object which is sphere in this perspective, will rotate on
all three axes. As child objects rotation will be in accordance with parent object,
the camera will also move on three axes which gives us a distorted view. In
Order to avoid this, we will add the camera using a Script. Offset value will
be the distance between player object and the camera. As the player is above
origin and camera is very closer to it we will select player transform position
as offset value. Using Add component button in the Inspector Window select a
new script. Name the script as “Camera controller”
and open it for editing. We declare two variables, Public Player Object
Variable and private Vector 3 Variable. As offset is declared in script we set
it as private.
Offset Value is declared as the cameras current position in Start
function “offset = transform.position”. For follow
cameras it is best to use Late update function, So in Late update function the
cameras position is equal to players transform position plus the offset value.
“transform.position=player.transform.position+offset”
Save script and return to unity. Drag player game object into the
player variable in Inspector window as reference to player game object. Enter
the play mode and validate that the camera works as expected.
Third person view or Birds Eye view Camera :
We included this is a secondary camera which can be used by
participant to have a Third person view or a Birds Eye view of the Plane or
Ground . In order to Facilitate this we Selected Create in Hierarchy Window and
Created a Camera object. Rename the object as Birds Eye camera. To have this
view keep the coordinates of Position as (0,25,2) and rotate the camera with
coordinates (90,0,0). We can either select the camera to be moving along with
the player object or just stationary. We used the above “camera controller”
script to make this camera move along with the movement of Player
Object.
Timer : In
order to Induce some anxiety in the participants we Introduced a CountDown
Timer.
Declare a public float variable timer, so we can update the timer
in GUI . in Update Function set the timer as “timer= timer -
Time.Deltatime” . Include a New function OnGUI to
display the timer in the Play Screen. Set the Following coordinates to display
the Timer in the Right Top corner of the screen
“GUI.Box (new Rect (Screen.width-100, 0, 100, 50) ,
timer.ToString (“0”));"
Add a If clause “if (timer=0) “
set timer as “0”
because the timer shows the negative values in Play screen and also to
quit the play mode once we are done with time add “ UnityEditor.EditorApplication.isPlaying=false”
Camera Toggle Option: As we have two cameras in the
game, we need an option to toggle between them, so we gave an option using Keys
“M” and “N” . The first view would be of
Main Camera, to display Second Camera view we should press Key “N” and to get back to Main camera view we need to press Key “M”
Create an Empty object and Rename it as Toggle , reset the
position of the object to origin.
Select Add Component and add new script. Declare two public variables
Maincam and Secondcam. In Start function enable the Main cam and disable the
second cam by using
maincam.enabled = true;
secondcam.enabled
= false;
In Update function to get the Key press use “Input.GetKeyDown”
and create two IF clause as below to toggle the cameras
if (Input.GetKeyDown ("m"))
{
maincam.enabled
= true;
secondcam.enabled
= false;
}
if (Input.GetKeyDown
("n"))
{
maincam.enabled
= false;
secondcam.enabled
= true;
}
validate that we are able to toggle in Play mode by pressing the
Keys.
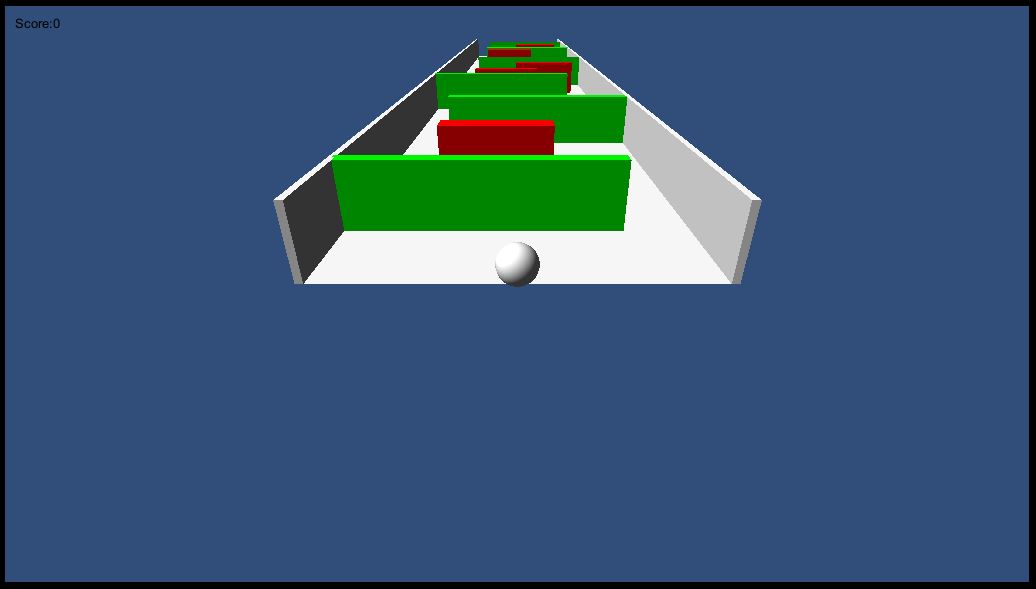
Creating the pool ball prefab:
We now have the play area, player, and camera’s setup for
our game. No we need to setup the other balls that our player will be trying to
knock off the table.
1.
In the Hierarchy window click on Create and
select Sphere
2.
Name this sphere “PoolBall”
3.
Now click and drag the “PoolBall” object from
the Hierarchy window to the Project window and put it in a “Prefab” folder.
4.
Delete the “PoolBall” object from the Hierarchy
as we will be programmatically adding a bunch of them.
5.
Add a script to the prefab “PoolBall” (it will
be used to select all the PoolBalls later)
6.
Change the “PoolBall” Material if you want.
Instantiating the pool balls:
1.
Select the “Player” object from the Hierarchy
and then open the Player Controller script for editing.
2.
When the game starts up we want to create a
bunch of the “PoolBall” prefabs first add a public variable called “numPoolBalls”.
This will allow us to dynamically change the number of balls in the game from
the Unity Editor.
3.
In the Start method add a for loop that loops
from 0 to numPoolBalls
4.
Inside the for loop you’ll want to run the
Instantiate method with the poolBallPrefab as the first parameter
5.
The second parameter in the Instantiate method
tells the program where to put the new object. Since we want it to be random
create a new Vector3 with a Random.Range between -8.0f and 8.0f for the x and z
value. For the y value put 0.5 as we want it to load on the table.
6.
For the final parameter you can just put
Quaternion.identity since it is a sphere and the rotation doesn’t matter in our
game.
7.
When you Instantiate you will want to capture
the new object in a GameObject.
8.
Edit the new objects renderer.material.color so
that it equals a new Color using Random.Range(0.0f,1.0f) for each of the
values. This will give you a random call for each ball.
9.
The completed section of code should look like
the following:
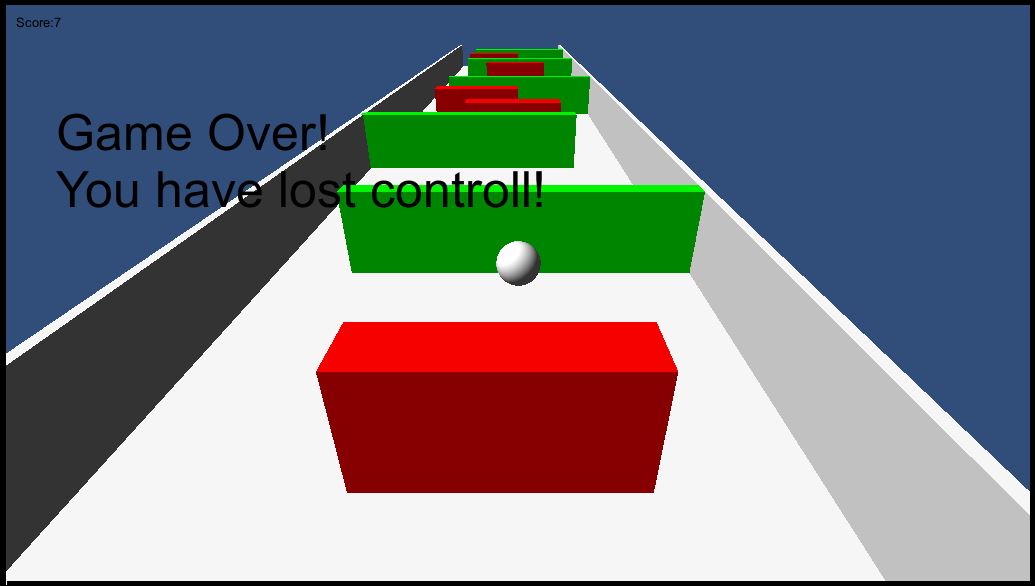
Scoring:
In order to track the number of balls the player has knocked
off the table we will be getting all objects of type PoolBallControler which is
the script that was added to the “PoolBall” prefab earlier.
1.
In the PlayerController script add two public
GUIText called countText and winText. Also add a private int called count.
2.
In the FixedUpdate method add a line that calls
the FindObjectsOfType with the typeof(PoolBallController) as the parameter.
3.
Capture the return of the FindObjectsOfType in a
PoolBallController array
4.
Create a new int called ballsOffTable and set it
to 0
5.
Loop through the array checking the
transform.position.y of each item in the array. If the y value is under 0
increase the value of ballsOffTable by one
6.
After the for loop set count equal to
ballsOffTable
7.
Call a method called SetCountText() which we
will create in the next step. The current code should look something like this:
8.
Create void SetCountText()
9.
Inside the method set countText.Text to “Count:
“ plus the value of count as a string
10. Also,
add an if statement that checks if the count is greater than or equal to
numPoolBalls. Inside the if statement set winText.text equal to “YOU WIN!!!!”
Resetting the Player Ball if it goes
off the table:
If the player ball goes off the table currently it will just
fall, instead we would like the ball to be reset back to the starting position.
1.
In the PlayerController script add a private
Vector3 called initialposition and a private Quaternion called initialrotation
2.
In the Start method set initialposition equal to
transform.position and initialrotation equal to transform.rotation.
3.
Now that we have the starting position of the
ball saved.
4.
In the FixedUpdate method add an if statement
that checks if gameObject.transform.position.y is less than 0. If it is set the
transform.position and transform.rotation to the values that were saved
previously.
Feel free to add some additional shading to the table and
side walls. After your done it should look something like the below image.
Troubleshooting:
When working
in Unity if you notice that you don’t have shadows it is possible that it is
due to your machine having integrated graphics. Follow the steps below for a
possible fix:
1.
Select
Edit > Project Settings > Player
2.
You will see a bunch of tabs for each of the
platforms that you can Build a Unity game for. It really doesn't matter which
tab you're on for the setting that needs changing.
3.
You will see a
few setting headers, Resolution and Presentation, Icon, Splash Image and Other
Settings. The setting I changed is found other the Other Settings section.
4.
The setting that
needs to be unchecked is Use Direct3D 11. This will force Unity to run using
Direct3D 9 (at least in my case).
5.
After you uncheck
Use Direct3D 11 Unity will alert you that it needs to reload the scene and with
any luck when it reloads you should now see shadows.


